When a homeowner or business owner first falls in love with the look of custom wood wall panels, one of the first questions they ask isn’t about stain options or wood grain clarity—it’s about how long the installation takes. As a wood wall panel supplier who’s worked with hundreds of clients over the past 12 years, I can tell you this: there’s no one-size-fits-all answer, but breaking down the variables makes it easy to plan your timeline without unnecessary stress. Today, I’ll walk you through every factor that impacts installation time, share real examples from recent projects I’ve been part of, and give you the clear, actionable info you need to set realistic expectations for your own space. Wood Wall Panel
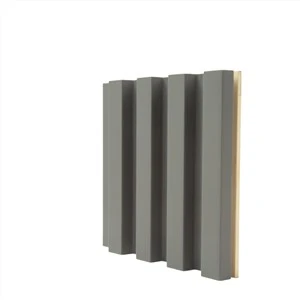
First, let’s start with the basics: installation time refers to hands-on work from our certified install team, not pre-install prep that a client might handle on their own. We always encourage clients to complete site prep before our team arrives, because cutting that step can add days (or even weeks) to a project. Site prep includes clearing the area of furniture, removing old wall coverings like wallpaper or tile, and ensuring the wall surface is smooth, dry, and level—all of which are non-negotiable for a seamless panel finish. If a client skips this, our team will have to spend time fixing uneven drywall or patching gaps on-site, which eats into installation time.
Next, the single biggest factor that changes installation time is the size of the space. It’s simple math: a small accent wall in a 10×12 home office will take far less time than a full wall treatment in a 2,000-square-foot great room with high, vaulted ceilings. To give you a concrete sense of what that looks like, let’s break down average timelines for common residential projects first, since that’s 70% of the work we do. For a standard 10×12 room with 8-foot ceilings and a 200-square-foot accent wall, our install team takes 8 to 12 hours to complete. That’s two installers working for one full business day, putting up panels, trimming edges, and doing final touch-ups like sanding small gaps or adjusting fit. For a larger 400-square-foot wall treatment in a living room, that timeline jumps to 20 to 28 hours—usually spread over two full days, since we don’t rush to avoid mistakes. High ceilings add another layer too: a wall that goes 10 feet up instead of 8 means more precise measuring and handling, so we add 2 to 4 hours for every additional 2 feet of height on walls over 9 feet.
Commercial projects have their own timeline rules, and they’re a bit more strict about scheduling because of business hours. A small retail store’s feature wall, around 300 square feet, can take 16 to 20 hours—often done over a weekend when the store is closed to avoid disrupting customers. Larger commercial spaces, like a 1,200-square-foot lobby wall for an office building, take 36 to 48 hours, again spread over two to three days to keep work neat and avoid errors. What slows commercial projects down most? Access and compliance: some office buildings require us to use specific entry points, load panels through freight elevators, and adhere to strict noise limits after 5 PM, which can cut into daily working hours and extend the overall timeline.
Once you know the size of the space, the next biggest variable is the type of wood wall panels you choose. This is where a lot of new clients get surprised, because panel style directly impacts complexity. Let’s compare the most popular options we supply: solid wood panels, engineered wood panels, and pre-finished vs. unfinished panels. Solid wood panels, like our traditional tongue-and-groove (T&G) cedar or oak options, require the most on-site fine-tuning. Each panel has to be cut to exact length, test-fitted, and adjusted for small gaps that come with natural wood expansion. For that same 200-square-foot accent wall I mentioned earlier, solid wood panels add 2 to 4 hours of work compared to engineered panels, because of that extra fitting step. Engineered wood panels, which are made of a wood veneer over a stable core, are much more uniform—each panel is pre-cut to standard sizes with precise edges, so they fit together like a puzzle almost immediately. That cuts installation time by about 20% compared to solid wood for the same square footage.
Then there’s the finish. Pre-finished panels, which we stain or seal in our workshop before shipping, eliminate one huge step: on-site staining or sealing. For a 200-square-foot wall, installing pre-finished panels takes 8 to 10 hours, with zero extra time for finishing work. Unfinished panels, by contrast, require us to sand edges, apply stain, and add a protective clear coat after installation. That adds another 4 to 8 hours of labor—plus a drying time of 24 hours before the space is fully usable. We always explain this to clients upfront: pre-finished panels are faster to install, but unfinished gives you the flexibility to customize the stain color to match your space exactly, so it’s a trade-off between timeline and personalization.
Another often-overlooked factor is design complexity. A simple, straight-across wall panel treatment is straightforward, but add in architectural features like doors, windows, corners, or built-in shelves, and the timeline jumps. For example, a 200-square-foot accent wall with one standard door cutout takes 10 to 12 hours, but a wall with three windows and two built-in shelf niches takes 14 to 18 hours. Why? We have to cut panels around each feature with a jigsaw, test-fit multiple pieces, and add trim to make everything look seamless. We also have to account for mitered corners, which require precise cuts to avoid gaps—each corner can add 30 minutes to an hour of work, depending on how sharp the angles are.
Now, let’s talk about what causes delays that are avoidable, because this is where a lot of clients end up waiting longer than planned. From our experience, 30% of project delays come from site prep issues that clients can fix before we arrive. Things like: walls that are not level (we’ve had projects where a 1/4-inch unevenness across a 10-foot wall required extra shimming to make panels fit), moisture on the wall surface (wood can warp if it’s installed on a damp wall, so we always test for moisture with a simple meter), or not clearing the area so our team has space to carry and handle large panels. We give every client a free site prep guide when they place an order, but sometimes it’s the small things—like leaving a stack of old boxes in the corner—that slow us down.
Another avoidable delay is ordering extra panels. We always recommend adding 10% to the total square footage when ordering, to account for cutting waste, mistakes, or future repairs. A few times, clients have ordered exactly the number of panels they need, and when we get to cutting around a door or window, we make a mistake and have to order an extra panel, which can add a week or two to the timeline. It’s a small investment that saves a lot of hassle.
There’s one more scenario that changes installation time: DIY vs. professional installation. A lot of clients ask if they can install the panels themselves to save money, and while it’s possible for simple projects, the timeline is very different. For a 200-square-foot accent wall, a skilled DIYer with basic tools might take 16 to 24 hours, spread over a weekend. For larger projects, DIY can take 3 to 5 times longer than professional installation, because of mistakes like uneven cuts or gaps that require reworking. We’ve seen clients try to install panels without experience, only to call our team back a week later to fix their mistakes, which actually ends up being more expensive than hiring us for the job in the first place.
Let’s circle back to real-world examples to make this all concrete. Last quarter, we worked on a project for a small café in downtown Austin. The client wanted a 350-square-foot feature wall made of solid reclaimed barn wood, with two window cutouts and a doorway leading to their seating area. They ordered pre-stained panels, so site prep was done in advance. Our two-person install team showed up on a Monday morning, had the panels unloaded and the space prepped by lunch, and finished the installation and final trim by close of business on Tuesday. Total hands-on time: 22 hours, which aligned perfectly with our initial estimate. The client was thrilled, because the timeline fit perfectly with their planned re-opening.
Another example: a residential client in Dallas who wanted a full 1,800-square-foot great room wall treatment with 10-foot vaulted ceilings. They chose engineered white oak panels, unfinished so they could stain them to match their existing hardwood floors. Site prep took them two weeks (they had to remove old carpet and level the drywall), and our three-person install team spent three full days putting up the panels (total hands-on time: 42 hours). We stayed an extra half-day to help them with the staining, and they had the space ready to use within four days of our team finishing. That’s 10 days total from start to usable space, which is what we quoted them upfront.
Now, what about the questions I get that aren’t about timeline, but tie into it? A lot of clients ask if installation time changes for curved walls or other custom shapes. Curved panels are more labor-intensive, because each panel has to be cut to follow the curve, so we add 30 to 50% more time to the project. For example, a 150-square-foot curved accent wall would take 12 to 18 hours, compared to 8 to 12 hours for a straight wall of the same size. It’s a small trade-off for a unique look, and we always share that timeline adjustment when clients show us custom designs.
As a supplier, our biggest goal is to be transparent with clients, so they never feel like the timeline is a surprise. That’s why we give every potential client a custom estimate for installation time, along with their panel quote. We ask for details like the space size, number of architectural features, type of wood and finish, and whether they’re using our professional install team or doing it themselves, and then we put together a clear timeline that accounts for every variable. We also build in buffer time for unexpected small issues—like a slightly uneven wall that needs a little extra shimming—so if something comes up, it doesn’t derail the whole project.

If you’re ready to plan your wood wall panel project, the best first step is to reach out to our team. We can walk through your space with you, answer any questions about timeline, panel options, or site prep, and give you a clear, accurate estimate. Whether you’re doing a small home accent wall or a full commercial feature, we have the experience to make the process smooth, and we’re here to help every step of the way. Don’t let timeline worries hold you back from getting the wood wall you’ve been dreaming of—we can work with your schedule to make it happen.
Mosaic Wood Panel References
- Wood Industry Association of North America. (2022). Installation Best Practices for Solid and Engineered Wood Wall Systems. WIA North America.
- National Association of the Remodeling Industry. (2023). 2023 Remodeling Project Timeline Guide. NARI.
- Engineered Wood Association. (2021). Time-Saving Tips for Installing Engineered Wood Wall Panels. APA – The Engineered Wood Association.
Dongguan MUMU Woodwork Co., Ltd.
Dongguan MUMU Woodwork Co., Ltd. is one of the most professional wood wall panel manufacturers and suppliers in China, featured by cheap products and good service. If you’re going to wholesale customized wood wall panel at low price, welcome to get quotation and free sample from our factory. Contact us for more discount information.
Address: Room No.2602, Universal Commerce Center,Dongguan, China 523073
E-mail: Jerry@mumu-ing.com
WebSite: https://www.mumu-ing.com/
